Voltage Regulator Operation & Tips – Part 1

Apr 28, 2024 Tips & Tricks

Voltage Regulator Operation & Tips – Part 1

I’ve had a few folks call me and say “Hey, this thing works different from the Fun Projects Voltage Regulator” (FPVR). Yup, and that is by design. Read on to see why. Some history/context will help here. 

The FPVR was a great innovation that was a much needed addition for a healthy charging system & battery. Unfortunately for us electronics guys, some practical realities exist that caused some operational problems with the way it was designed to work in our Model T cars and what we’re all used to seeing on our ammeters.

I’ve been on a LOT of tours. On one tour soon after I got my car I was having problems with my battery staying charged. One helpful guy at one of our stops offered to help me diagnose the problem. Here, take this piece of baling wire (we all have bailing wire handy, right?) and connect the output of the generator directly to the battery terminal on the cutout while the car is running. If you then see a charge on your ammeter, your cutout is bad. Being an electronics engineer, this made perfect sense. Bypass the bad part to see if things worked. In this case it did. He suggested getting rid of the cutout and buying a FP VR. I drove the rest of the day with a bailing wire jumper on my cutout, removing it before turning the engine off.

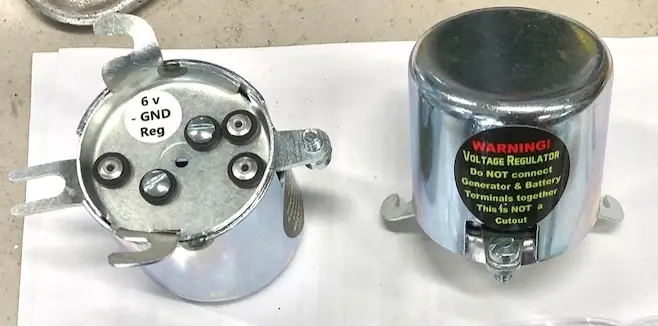
Now, performing this trick with a FPVR (or any voltage regulator for that matter, including mine) will INSTANTLY destroy the sensitive electronic components inside the VR. VR’s are not relays. They are electronics, and that’s a BIG difference. So unfortunately for all of us, folks who have been used to this diagnostic method in the past and when doing it with VR’s, they blow them up rendering them useless. The way they blow up they short the generator output to ground, so to get your charging system to work again, you have to remove the VR and install a new one, or put your old, temperamental cutout back in play. I put this sticker on the batter side of all my VR’s. Remove at your own risk!

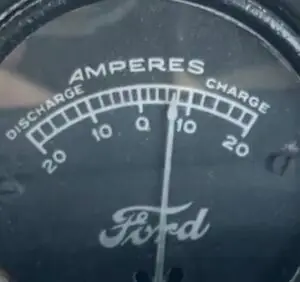
The FPVR used PWM (pulse width modulaton) too pulse the charge of the generator on/off very quickly. If the battery needed a bigger charge, it would pulse on/off more. If it needed little or no charge it would pulse on/off less. This means when the car is running, the lights are off and the battery is fully charged, you see little if any movement in you ammeter. Model T owners are used to seeing their ammeter either + or – indicating charge or discharge, so this situation caused some to ponder if their regulator was working at all? I must confess, I was in this same boat. So, what trick do we use? Bailing wire. What happens, BOOM. The regulator blows up.  I even blew one up.

A better test is to run the engine at a cruising speed RPM and turn on your lights, step on the brake so the brake light comes on and THEN see if there is any charge going into the battery.

With this background in mind, we can now look at how my Voltage Regulator operates differently from the FPVR in Part 2.

Voltage Regulator Operation & Tips – Part 2

Apr 25, 2024 Tips & Tricks

Voltage Regulator Operation & Tips – Part 2

In the previous post I described how the FPVR operates.  In this article I’ll describe how my VR (MTSVR) operates and why we chose this design.

As mentioned previously, the FPVR is a proportional charger.  If the battery is fully charged, there is no or very little movement on the ammeter.  This can be a little disconcerting for Model T folks who are used to seeing their meter move.  With this in mind, we had an idea.  What if we designed our regulator to be either ON or OFF.  if the battery needs to be charged, it’s ON.  When it’s fully charged, it is OFF. Either design will keep any battery optimally charged for use and these designs are both widely used in commercially available battery chargers. Either method does a great job of keep a battery charged.

The benefit with the MTSVR is when you first start your car, you will immediately see the VR charging the battery at whatever charge current you have your 3rd brush set for, assuming your motor is revved to driving speed (not idling).  Once the battery voltage reaches approximately 7.2v, the regulator turns off and the ammeter will show a discharge until the battery voltage drops to approximately 6.1v and will then turn back on.  The cycle then repeats and you can watch it happen.  When it’s off, turn your lights on or press your brake light and you’ll see the regulator kick in and turn back on.

There is NO DOUBT  about whether or not it is working.  It’s painfully obvious – it’s either ON or its OFF.  It is normal to see this cycle repeat at different intervals depending on what is turned on in your car.  If your incandescent headlights are on, it might stay on all the time.  When I use my LED headlights while driving they only draw a measly 1A, so it’s off most of the time.  Only when the battery voltage drops to ~6.1v does the MTSVR turn on.A couple scenarios are instructive.  Let’s say you have your 3rd brush set for 5A as I recommend.  You might see this on/off cycle occur every 2 -5 minutes after driving for a while and the battery gets “topped up” and fully charged.  It could go on for only a few seconds, then off for a couple of minutes or longer.  Perfectly normal.Let’s say you set your 3rd brush for 10A which I do NOT recommend, but it will work.  You’ll see it ON for a 1-2 seconds, then off for a little longer, and repeat at a much more rapid rate.  This is because if you’re pumping 10A into your battery and the draw is low (say, just your coils) the battery tops up quickly, thus causing the regulator to turn off quickly. Setting a high rate of charge will also cause your headlights to flicker when the regulator kicks on & off.  Its much better to set your 3rd brush to a nominal 5A (or 2-3A with LED headlights) or so, not tax your generator and let the MTSVR do it’s job.

Generator Charge Rates Tips & Tricks

Apr 3, 2024 Tips & Tricks

Generator Charge Rates Tips & Tricks

Installing my new Voltage Regulator is a very worthwhile upgrade to the standard or diode cutout – it will keep your battery topped off without overcharging it.  But there are some things to keep in mind when looking at different cars & equipment on those cars.

Original Ford Model T’s really had only a few devices that draw power from the battery:

  • Buzzboxes/coils
  • Headlights
  • Brake Lights
  • Horn

That’s it.  Headlights might draw 5A while they’re on & coils 2-3A, so you could see 7-8A more or less of battery draw at night.  So you might think well, I’ll just set my generator’s 3rd brush for 10A output and all will be fine.  Not so.

The Model T generator is rated for a maximum 100 watts of Power calculated as follows (Power = Voltage * Current).  so, 6.4V x 10A = 64w  or 64% of the generators maximum 100w rated output.  And 100 watts of output is assuming a brand new generator with new field coils, a new armature, new brushes, etc, NOT that 100+ year old unit in your car.  So, at 60watts of output today,  that might be 100% of what your generator is capable of, so it won’t be very long before you’re buying another one after yours gives up the ghost, depending on how much you drive your car.

A much better solution is to lower your charge rate to 5A, and let the battery recharge more slowly over time as you drive the car, putting less stress on your entire charging system.  Of course if you only drive your car at night (highly unlikely) this won’t work, but for the vast majority of us who tour our cars and occasionally use our headlights, it works very well.