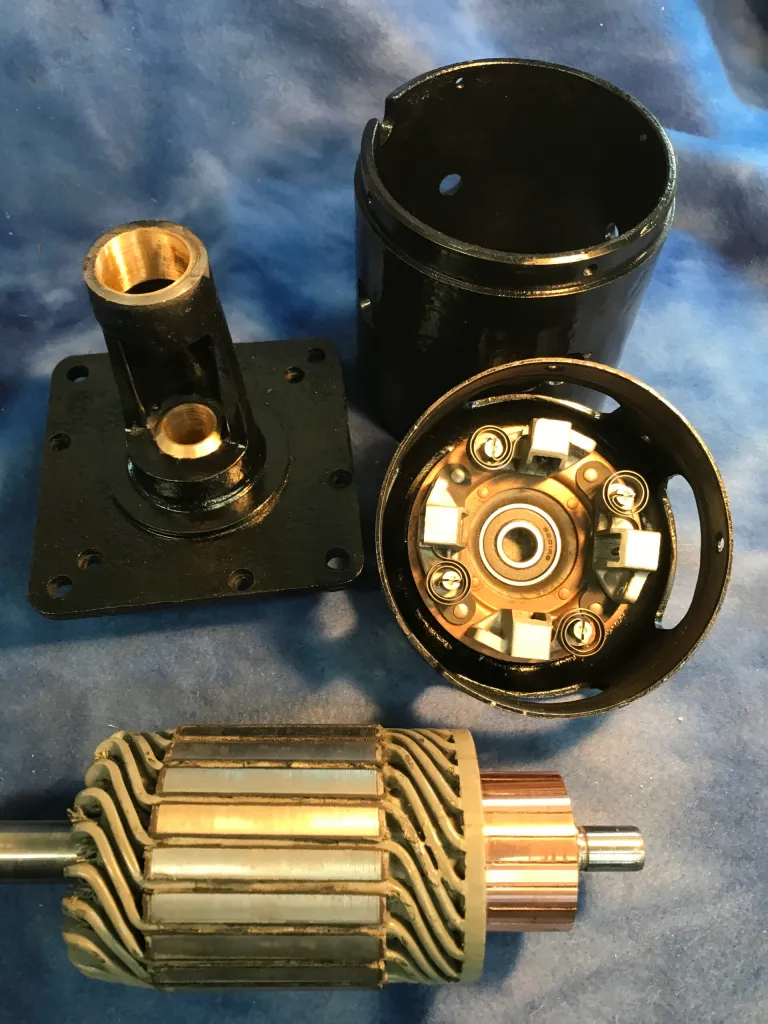
12volt Starter Conversions

Ford Model t

12 volt starter 
conversions

July 4th Parade. Not how you want your grand entrance to look after a broken Bendix…

The original Model T Starters were designed to be used with 6 volts, not 12! Apply 12 volts to them and they may seem to crank better but there is a hidden danger lurking. 12 volts slams the bendix into the flywheel at an amazing speed sort of like a speeding bullet into a steel plate. It is only a matter of time before the delicate bendix gives up the ghost and obliterates itself, or worse, destroys your flywheel ring gear by chipping a tooth. The worst is yet to come though. Once those bendix or flywheel parts go flying, all kinds of mayhem ensue. In the photo below, the Bendix gear broke (not shown) and the broken pieces went whirling around inside the engine/transmission case causing major damage to multiple parts of the magneto and destroyed 2 of the the transmission drums as well.
Bent Bendix counterweight
The results of a broken bendix.

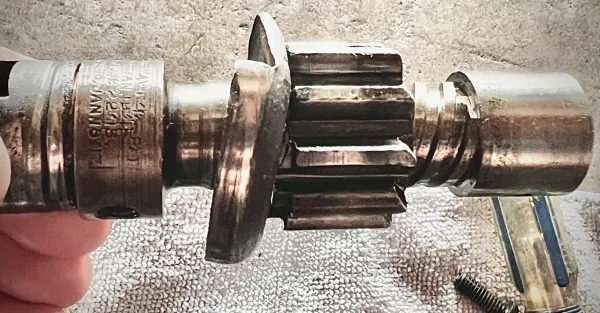
Another VERY common problem using 12 volts on your 6 volt starter is the tiny starter shaft woodruff key gets sheared in half due to the tremendous torque being applied to the bendix by the shaft. This necessitates removing the bendix and replacing the key. Again. Not exactly how I want to spend my evening during a tour.

Hearing from folks and their horror stories like the ones above is what led me to perfect the conversion of 6 volt Model T starters to 12 volts. It may sound simple, but it is anything but. The work is tedious and the modifications need to fit inside the starter housing just perfectly. I’ve been doing these conversions for several years, and learned a lot along the way. I’ve settled on what I feel is the best and most reliable method for doing these conversions. All of the processes and methods I use on 6v starters apply here with the added modifications to the field coils for 12v use.
I always start with a brand new new set of field coils. Old field coils are just not suitable for repurposing to 12v in my opinIon or in any Model T starter rebuild for that matter. No matter how well you think you’ve rewrapped those old coils, you can never replace the fine paper insulators between the coil windings, so they invariably short out over time and reduce the torque of the starter.
I use part of an old solid copper starter field winding to make the 12v jumper connection and silver solder each connection point.
The brush wires also need to be modified which is a major undertaking. In an effort to share what I’ve learned, here are some pictures of the modifications. Rebuilding a 6v starter performing all the steps I outline is a multi-week effort, and I try to do about 5-6 of them at a time. All told, it adds about another 3-5 hours of work to do the 12 volt conversion mod correctly if everything cooperates and the stars align. Invariably I always seem to miss the lunar alignment and it takes lot more time than that.

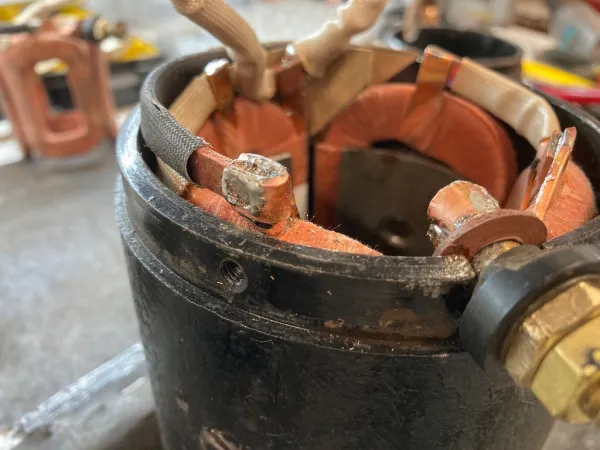
Here’s the field coil jumper mod after cutting the main input line:

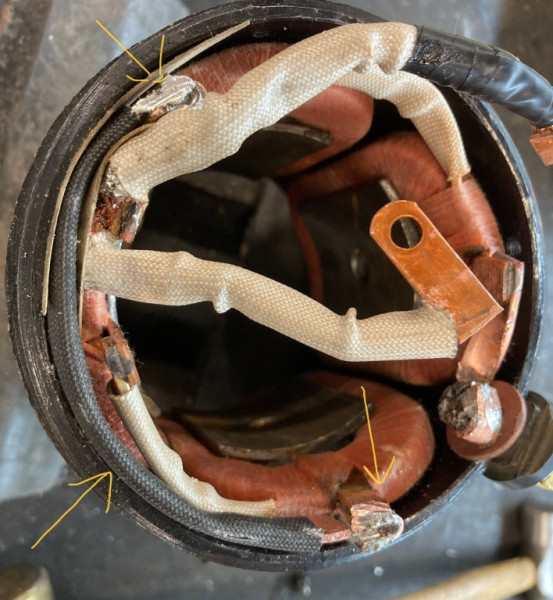
Here’s the brush wires modification. Notice the fiberglass insulator behind the junction:

The new field coil jumper:

For the post modification I’ve settled on using a 10-32 threaded brass screw+brass nut through the post and field winding, then silver soldered in place. This does a good job of securing those parts and protecting them from vibration and damage. Apply lots of paste soldering flux, use a BIG soldering iron and heat the parts well before applying solder.
After completing these mods the trick is to make it all fit in place with no shorts. I use tried and true fiberglass insulators and careful lead routing. And THAT is all a lot easier said than done.

The end result is a reliable 12 volt Model T starter that saves your ring gear, bendix and all the other delicate parts in the starting system from abuse and destruction.


These units are made to order and typically take me about a week to complete them.